pipeline {
    agent {
        docker { image 'node:16.13.1-alpine' }
    }
    stages {
        stage('Test') {
            steps {
                sh 'node --version'
            }
        }
    }
}Using Docker with Pipeline
Table of Contents
Many organizations use Docker to unify their build
and test environments across machines, and to provide an efficient mechanism
for deploying applications. Starting with Pipeline versions 2.5 and higher,
Pipeline has built-in support for interacting with Docker from within a
Jenkinsfile.
While this section will cover the basics of utilizing Docker from within a
Jenkinsfile, it will not cover the fundamentals of Docker, which can be read
about in the
Docker Getting Started Guide.
Customizing the execution environment
Pipeline is designed to easily use
Docker
images as the execution environment for a single
Stage
or the entire Pipeline. Meaning that a user can define the tools required for
their Pipeline, without having to manually configure agents.
Practically any tool which can be
packaged in a Docker container.
can be used with ease by making only minor edits to a Jenkinsfile.
Jenkinsfile (Declarative Pipeline)
When the Pipeline executes, Jenkins will automatically start the specified container and execute the defined steps within it:
[Pipeline] stage
[Pipeline] { (Test)
[Pipeline] sh
[guided-tour] Running shell script
+ node --version
v14.15.0
[Pipeline] }
[Pipeline] // stage
[Pipeline] }
Workspace synchronization
Short: if it is important to keep workspace synchronized with other stages, use reuseNode true.
Otherwise, dockerized stage can be run on any other agent or on the same agent, but in temporary workspace.
By default, for containerized stage, Jenkins does:
-
pick any agent,
-
create new empty workspace,
-
clone pipeline code into it,
-
mount this new workspace into container.
If you have multiple Jenkins agents, your containerized stage can be started on any of them.
When reuseNode set to true: no new workspace will be created, and current workspace from current agent will be mounted into container, and container will be started at the same node, so whole data will be synchronized.
Jenkinsfile (Declarative Pipeline)
pipeline {
    agent any
    stages {
        stage('Build') {
            agent {
                docker {
                    image 'gradle:6.7-jdk11'
                    // Run the container on the node specified at the top-level of the Pipeline, in the same workspace, rather than on a new node entirely:
                    reuseNode true
                }
            }
            steps {
                sh 'gradle --version'
            }
        }
    }
}Caching data for containers
Many build tools will download external dependencies and cache them locally for future re-use. Since containers are initially created with "clean" file systems, this can result in slower Pipelines, as they may not take advantage of on-disk caches between subsequent Pipeline runs.
Pipeline supports adding custom arguments which are passed
to Docker, allowing users to specify custom
Docker Volumes
to mount, which can be used for caching data on the
agent
between Pipeline runs. The following example will cache ~/.m2 between
Pipeline runs utilizing the
maven container,
thereby avoiding the need to re-download dependencies for subsequent runs of
the Pipeline.
Jenkinsfile (Declarative Pipeline)
pipeline {
    agent {
        docker {
            image 'maven:3.8.1-adoptopenjdk-11'
            args '-v $HOME/.m2:/root/.m2'
        }
    }
    stages {
        stage('Build') {
            steps {
                sh 'mvn -B'
            }
        }
    }
}Using multiple containers
It has become increasingly common for code bases to rely on
multiple, different, technologies. For example, a repository might have both a
Java-based back-end API implementation and a JavaScript-based front-end
implementation. Combining Docker and Pipeline allows a Jenkinsfile to use
multiple types of technologies by combining the agent {} directive, with
different stages.
Jenkinsfile (Declarative Pipeline)
pipeline {
    agent none
    stages {
        stage('Back-end') {
            agent {
                docker { image 'maven:3.8.1-adoptopenjdk-11' }
            }
            steps {
                sh 'mvn --version'
            }
        }
        stage('Front-end') {
            agent {
                docker { image 'node:16.13.1-alpine' }
            }
            steps {
                sh 'node --version'
            }
        }
    }
}Using a Dockerfile
For projects which require a more customized execution environment, Pipeline
also supports building and running a container from a Dockerfile in the source
repository. In contrast to the previous approach of using
an "off-the-shelf" container, using the agent { dockerfile true } syntax will
build a new image from a Dockerfile rather than pulling one from
Docker Hub.
Re-using an example from above, with a more custom Dockerfile:
Dockerfile
FROM node:16.13.1-alpine

RUN apk add -U subversion
By committing this to the root of the source repository, the Jenkinsfile can
be changed to build a container based on this Dockerfile and then run the
defined steps using that container:
Jenkinsfile (Declarative Pipeline)
pipeline {
    agent { dockerfile true }
    stages {
        stage('Test') {
            steps {
                sh 'node --version'
                sh 'svn --version'
            }
        }
    }
}
The agent { dockerfile true } syntax supports a number of other options which
are described in more detail in the
Pipeline Syntax section.
Using a Dockerfile with Jenkins Pipeline
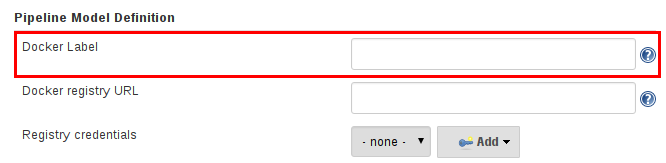
Specifying a Docker Label
By default, Pipeline assumes that any configured agent is capable of running Docker-based Pipelines. For Jenkins environments which have macOS, Windows, or other agents, which are unable to run the Docker daemon, this default setting may be problematic. Pipeline provides a global option in the Manage Jenkins page, and on the Folder level, for specifying which agents (by Label) to use for running Docker-based Pipelines.
Advanced Usage with Scripted Pipeline
Running "sidecar" containers
Using Docker in Pipeline can be an effective way to run a service on which the build, or a set of tests, may rely. Similar to the sidecar pattern, Docker Pipeline can run one container "in the background", while performing work in another. Utilizing this sidecar approach, a Pipeline can have a "clean" container provisioned for each Pipeline run.
Consider a hypothetical integration test suite which relies on a local MySQL
database to be running. Using the withRun method, implemented in the
Docker Pipeline plugin’s support for Scripted Pipeline,
a Jenkinsfile can run MySQL as a sidecar:
node {
    checkout scm
    /*
     * In order to communicate with the MySQL server, this Pipeline explicitly
     * maps the port (`3306`) to a known port on the host machine.
     */
    docker.image('mysql:5').withRun('-e "MYSQL_ROOT_PASSWORD=my-secret-pw" -p 3306:3306') { c ->
        /* Wait until mysql service is up */
        sh 'while ! mysqladmin ping -h0.0.0.0 --silent; do sleep 1; done'
        /* Run some tests which require MySQL */
        sh 'make check'
    }
}
This example can be taken further, utilizing two containers simultaneously. One "sidecar" running MySQL, and another providing the execution environment, by using the Docker container links.
node {
    checkout scm
    docker.image('mysql:5').withRun('-e "MYSQL_ROOT_PASSWORD=my-secret-pw"') { c ->
        docker.image('mysql:5').inside("--link ${c.id}:db") {
            /* Wait until mysql service is up */
            sh 'while ! mysqladmin ping -hdb --silent; do sleep 1; done'
        }
        docker.image('centos:7').inside("--link ${c.id}:db") {
            /*
             * Run some tests which require MySQL, and assume that it is
             * available on the host name `db`
             */
            sh 'make check'
        }
    }
}
The above example uses the object exposed by withRun, which has the
running container’s ID available via the id property. Using the container’s
ID, the Pipeline can create a link by passing custom Docker arguments to the
inside() method.
The id property can also be useful for inspecting logs from a running Docker
container before the Pipeline exits:
sh "docker logs ${c.id}"Building containers
In order to create a Docker image, the Docker Pipeline
plugin also provides a build() method for creating a new image, from a
Dockerfile in the repository, during a Pipeline run.
One major benefit of using the syntax docker.build("my-image-name") is that a
Scripted Pipeline can use the return value for subsequent Docker Pipeline
calls, for example:
node {
    checkout scm

    def customImage = docker.build("my-image:${env.BUILD_ID}")

    customImage.inside {
        sh 'make test'
    }
}
The return value can also be used to publish the Docker image to
Docker Hub,
or a custom Registry,
via the push() method, for example:
node {
    checkout scm
    def customImage = docker.build("my-image:${env.BUILD_ID}")
    customImage.push()
}
One common usage of image "tags" is to specify a latest tag for the most
recently, validated, version of a Docker image. The push() method accepts an
optional tag parameter, allowing the Pipeline to push the customImage with
different tags, for example:
node {
    checkout scm
    def customImage = docker.build("my-image:${env.BUILD_ID}")
    customImage.push()

    customImage.push('latest')
}
The build() method builds the Dockerfile in the current directory by
default. This can be overridden by providing a directory path
containing a Dockerfile as the second argument of the build() method, for example:
node {
    checkout scm
    def testImage = docker.build("test-image", "./dockerfiles/test") (1)

    testImage.inside {
        sh 'make test'
    }
}| 1 | Builds test-image from the Dockerfile found at ./dockerfiles/test/Dockerfile. |
It is possible to pass other arguments to
docker build
by adding them to the second argument of the build() method.
When passing arguments this way, the last value in the that string must be
the path to the docker file and should end with the folder to use as the build context)
This example overrides the default Dockerfile by passing the -f
flag:
node {
    checkout scm
    def dockerfile = 'Dockerfile.test'
    def customImage = docker.build("my-image:${env.BUILD_ID}", "-f ${dockerfile} ./dockerfiles") (1)
}| 1 | Builds my-image:${env.BUILD_ID} from the Dockerfile found at ./dockerfiles/Dockerfile.test. |
Using a remote Docker server
By default, the Docker Pipeline plugin will communicate
with a local Docker daemon, typically accessed through /var/run/docker.sock.
To select a non-default Docker server, such as with
Docker Swarm,
the withServer() method should be used.
By passing a URI, and optionally the Credentials ID of a Docker Server Certificate Authentication pre-configured in Jenkins, to the method with:
node {
    checkout scm

    docker.withServer('tcp://swarm.example.com:2376', 'swarm-certs') {
        docker.image('mysql:5').withRun('-p 3306:3306') {
            /* do things */
        }
    }
}|
For Currently neither the Jenkins plugin nor the Docker CLI will automatically
detect the case that the server is running remotely; a typical symptom would be
errors from nested When Jenkins detects that the agent is itself running inside a Docker
container, it will automatically pass the Additionally some versions of Docker Swarm do not support custom Registries. |
Using a custom registry
By default the Docker Pipeline integrates assumes the default Docker Registry of Docker Hub.
In order to use a custom Docker Registry, users of Scripted Pipeline can wrap
steps with the withRegistry() method, passing in the custom Registry URL, for
example:
node {
    checkout scm

    docker.withRegistry('https://registry.example.com') {

        docker.image('my-custom-image').inside {
            sh 'make test'
        }
    }
}
For a Docker Registry which requires authentication, add a "Username/Password"
Credentials item from the Jenkins home page and use the Credentials ID as a
second argument to withRegistry():
node {
    checkout scm

    docker.withRegistry('https://registry.example.com', 'credentials-id') {

        def customImage = docker.build("my-image:${env.BUILD_ID}")

        /* Push the container to the custom Registry */
        customImage.push()
    }
}Please submit your feedback about this page through this quick form.
Alternatively, if you don't wish to complete the quick form, you can simply indicate if you found this page helpful?
See existing feedback here.