set OUT=jmeter.save.saveservice.output_format
set JMX=c:\jmeter\bin\jenkins.io.jmx
set JTL=c:\jmeter\reports\jenkins.io.report.jtl
c:\jmeter\bin\jmeter -j %OUT%=xml -n -t %JMX% -l %JTL%
Using JMeter with Jenkins
Table of Contents
There are big advantages to use JMeter and Jenkins together. Continuous Integration and Test Automation become standards on the DevOps world, but the performance levels and system complexity are increasing day by day.
Luckily, with Jenkins we can integrate all JMeter tests in our pipeline process and better understand the details of our applications.
Some of the main benefits of using JMeter with Jenkins are:
-
Unattended test execution for each system
-
Logs of build failures and recovery steps
-
Secure and easy access to test reports of each build
-
Automate routine work
The Apache JMeter
Apache JMeter may be used to test performance of static sites, dynamic sites, and complete web applications. It can be used to simulate a heavy load on a server, group of servers, network or object to test its strength or to analyze overall performance under different load types.
Jenkins Installation
The Jenkins docs already have a page to help us with the Jenkins installation process.. This guide uses the .jar installation. Visit the Guided tour page if you want to use it too. Both will give you the same results.
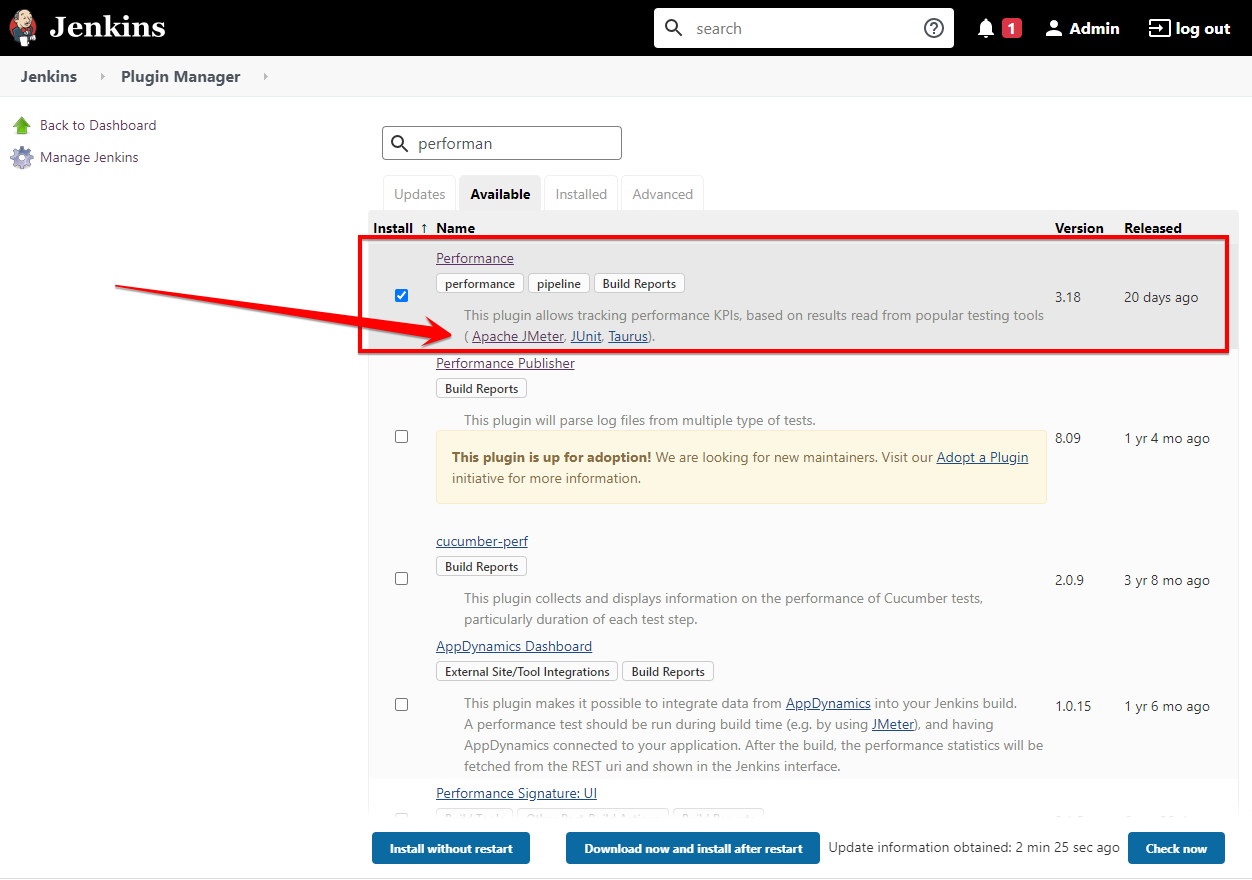
Install the performance plugin
In order to integrate JMeter with Jenkins, we will work with the Performance Plugin.
Follow these steps to install it:
-
From your Jenkins dashboard page go to:
Manage Jenkins -
Go to
Manage Pluginspage; -
Click on the
Available Taband write 'performance' in the search field; -
Mark the installation checkbox and press the button: "Install without restart"
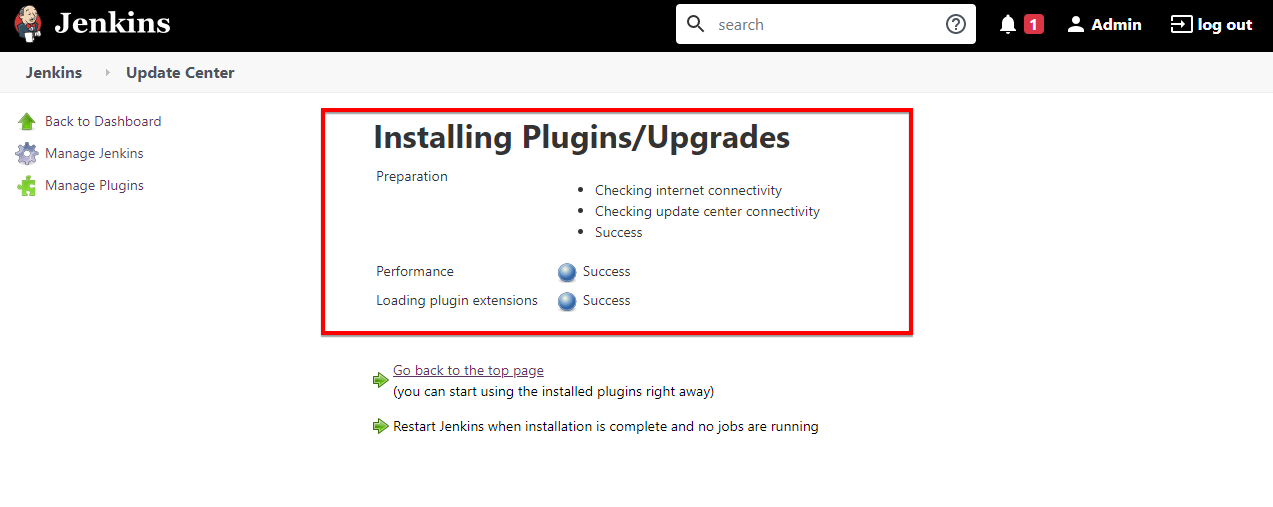
-
If everything goes well you will receive this confirmation screen:
JMeter Installation
In order to Install JMeter follow these steps:
-
Pick your download option based on your system: .zip for windows or .tgz to Linux (I’m on windows, so I get the .zip option)
-
Extract the downloaded file in your preferred location. (e.g.: c:\jmeter)
-
Now edit the file:
<YOUR-JMETER-PATH>>\bin\user.properties; (e.g.: C:\jmeter\bin in my case) -
Add this command to last line of file:
jmeter.save.saveservice.output_format=xml, save and close the file edit;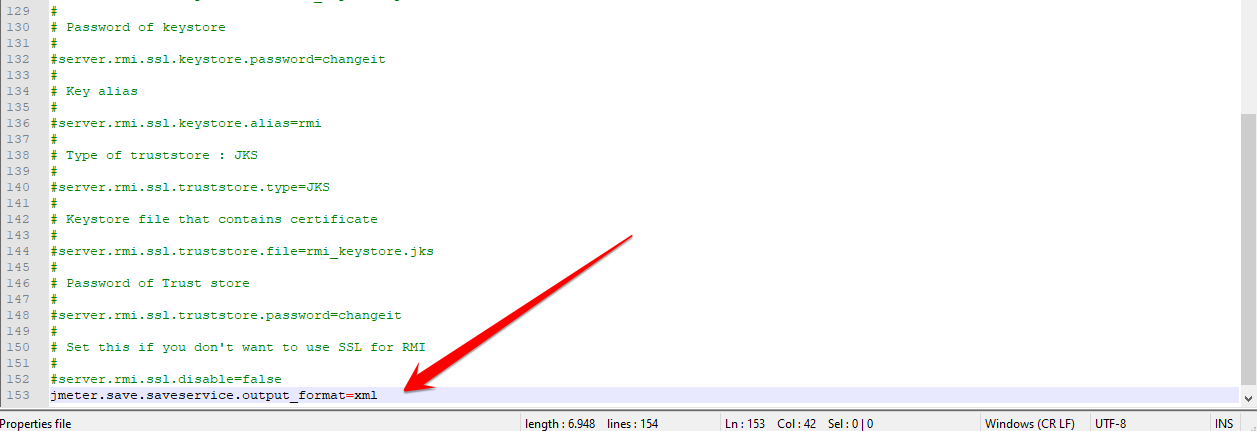
-
That command will help us to integrate the JMeter output into Jenkins.
-
Now let’s create our JMeter test plan.
First JMeter Test Plan using a GUI
JMeter uses Test Plans to organize each test. Once configured Jenkins will call all test plans defined on a pipeline and then show the results inside the build reports. It means you need to set all Test plans on JMeter as a first step and then info to Jenkins which test it needs to call.
Follow these steps to create a Test Plan:
-
Run the file:
<YOUR-JMETER-PATH>>\bin\jmeter.batto open the JMeter GUI; (e.g.: C:\jmeter\bin\jmeter.bat in my case)-
To Linux user will be the jmeter.sh
-
In a definitive installation you can set these commands to your path system or System variables
-
-
From JMeter GUI go to
File menuand then pick theNew option; -
Fill a name to your test plan. (e.g.: Jenkins.io Test Plan )
-
Now on the left side, click with the right button on your test plan item, go through this path
Add > Thread(users) > Thread Group, and select it.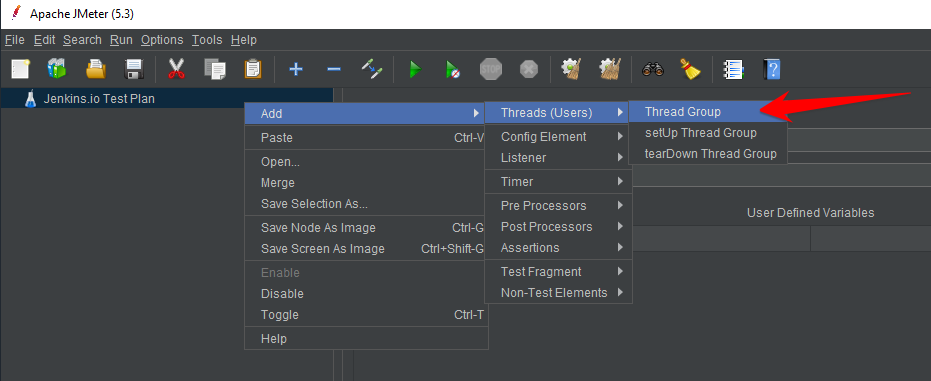
-
Increase the
Number of threads (users)to 5 at Thread Group and to 2 on theLoop Count; -
Now on the left side, click with the right button on your Thread Group item, go though:
Add > Sampler > Http Requesterand select Http Requester option;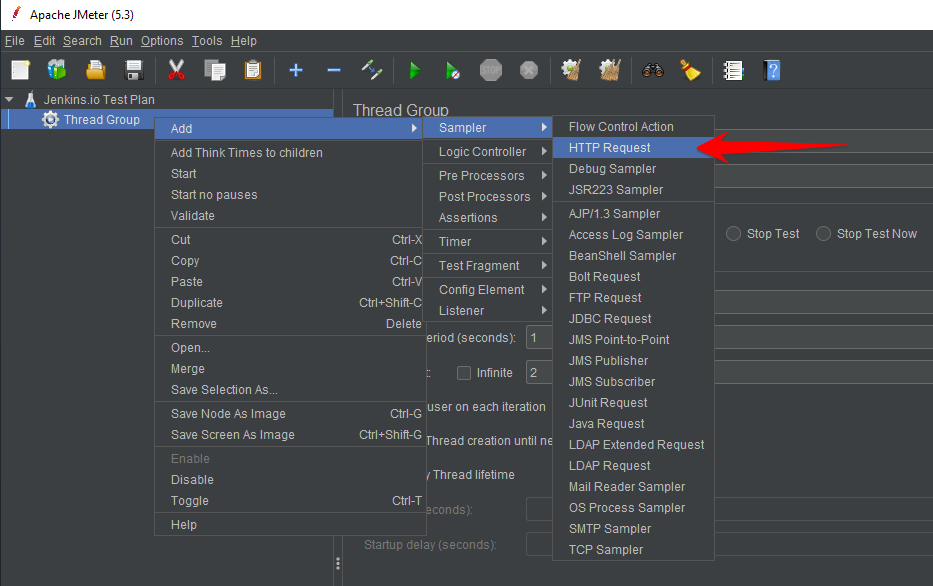
-
At Http Request, Fill: The
Nameof test, theServer Name, and thePath Context; (e.g: Installing; www.jenkins.io; and /doc/book/installing/ )
-
Repeat steps 6 and 7 more two times to different contexts/pages. (e.g.: www.jenkins.io/node)
-
Now our plan has 3 things to test.
-
To add a visual report click with the right button on your Thread Group item, go though:
Add > Listener > View results in tableand select View results in table option;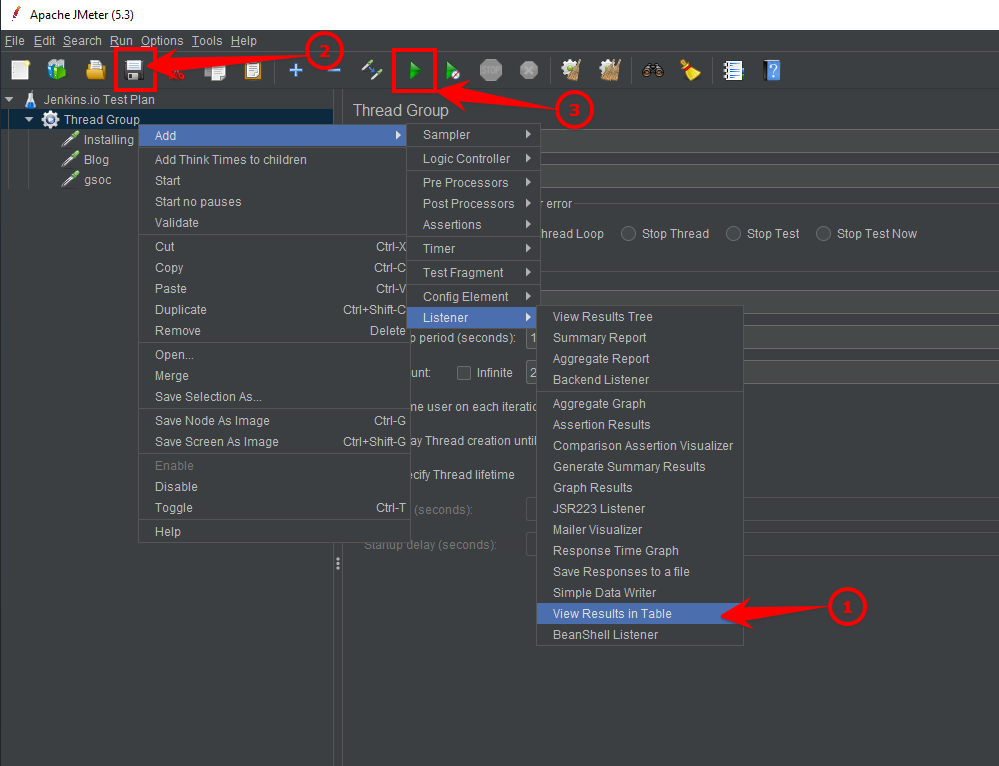
-
Now let’s save our test plan. Click on "disk icon", give a name a save with a .jmx extension (e.g.: jenkins.io.jml)
-
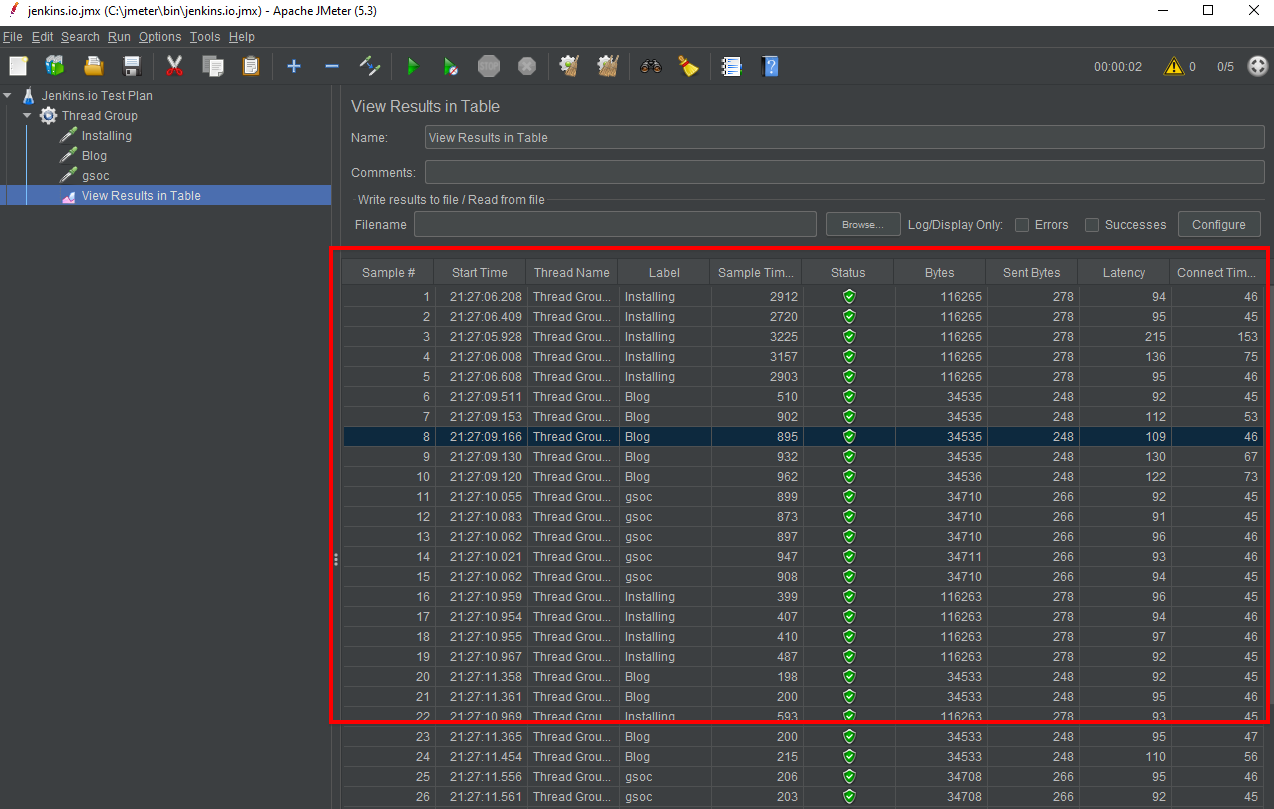
Now run the test and see the table results.
First JMeter Test Plan using terminal commands
Our test is working well in the graphical user interface, but in order to integrate it with Jenkins, it needs to run from the command line.
Follow these steps to test:
-
From the terminal run the command:
-
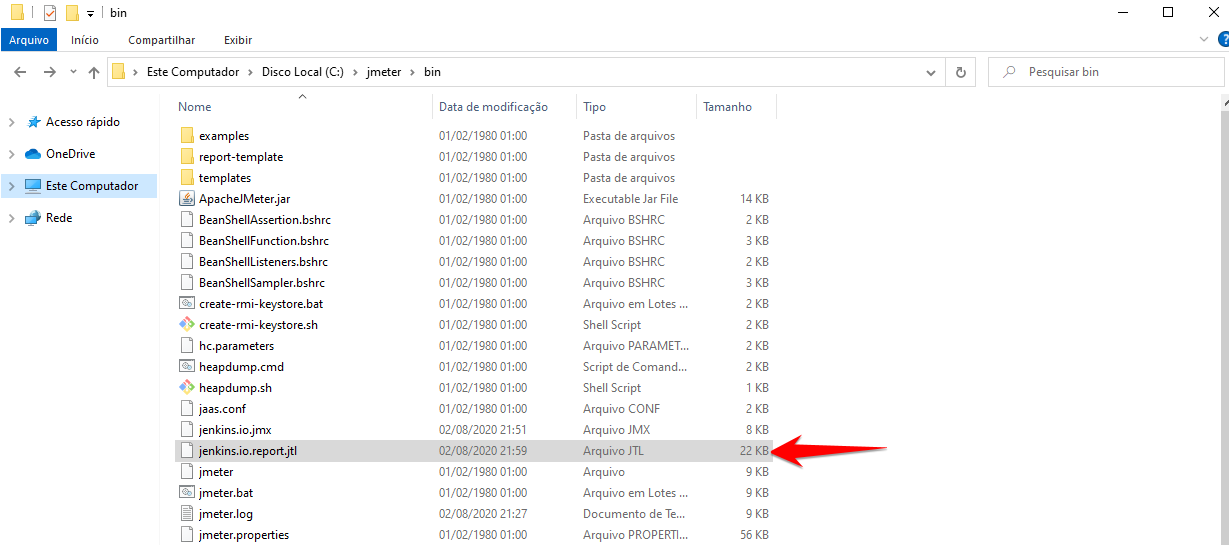
If everything works well the report file will be create at indicated location by -l parameter:
Jenkins and JMeter running together
Now we have everything we need to execute JMeter from Jenkins. Follow these steps:
-
From Jenkins dashboard go to
New Item; -
Fill the item name (e.g.: JmeterTest), select freestyle project, then press OK;
-
Go to
Build Environmenttab, click onAdd build step, and select the option:Execute Windows batch command -
Now fill the field with same code we use to run JMeter at previous section:
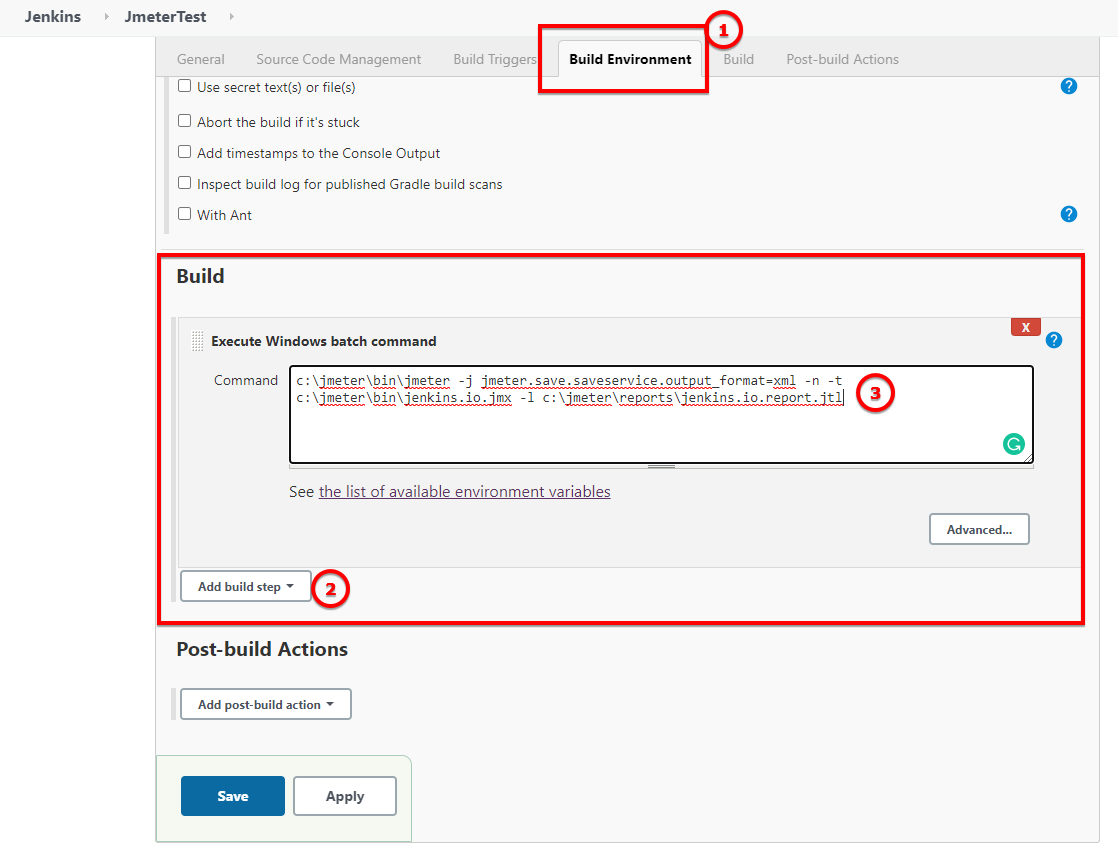
-
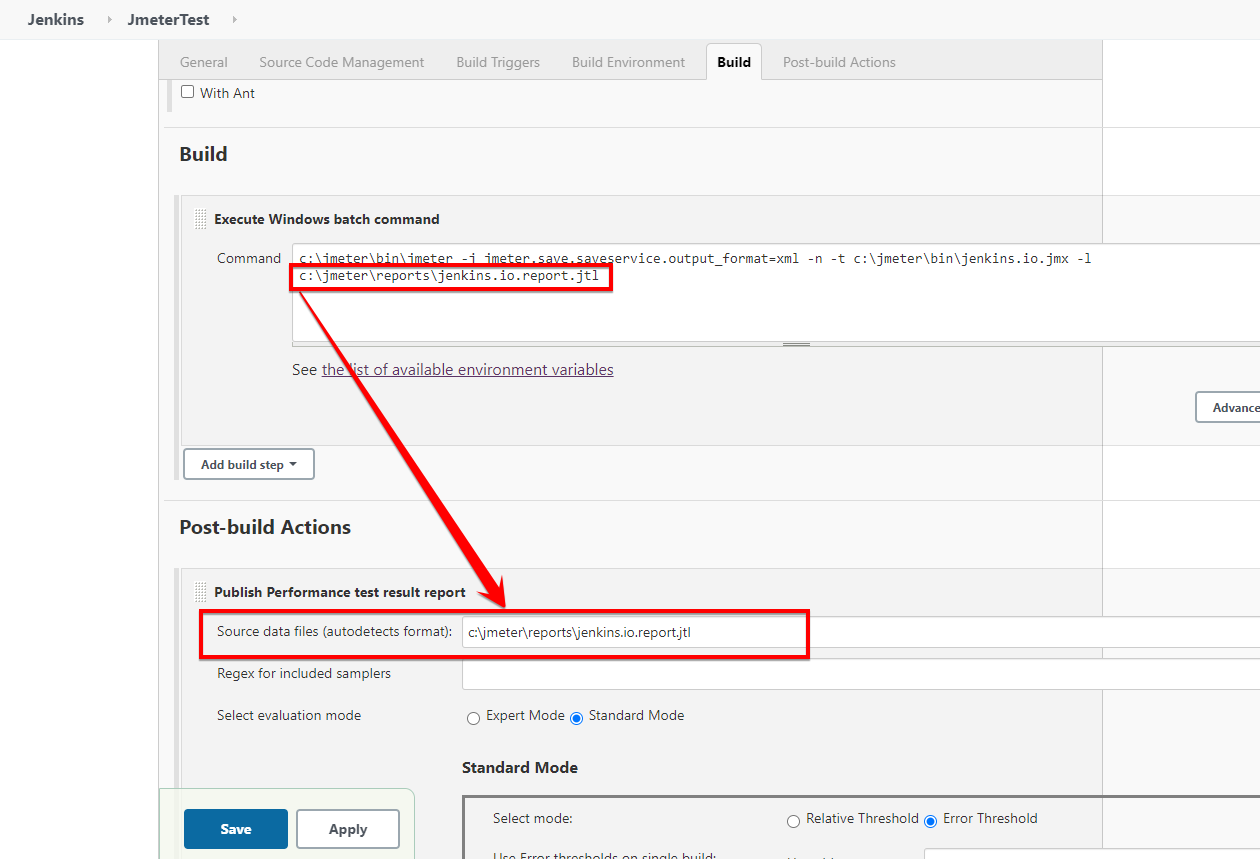
Now go to
Post-build Action tab, Click onAdd post-build actionthen selectPublish Performance test result report;This option comes from the performance plugin if you can see it now please check the previous section and make sure you have installed the plugin.
-
Now Fill the source of our reports:
-
Now Save the project and then click on
Build Nowfrom jmeterTest page -
After the job finish, go to the Console output view to see the execution details.
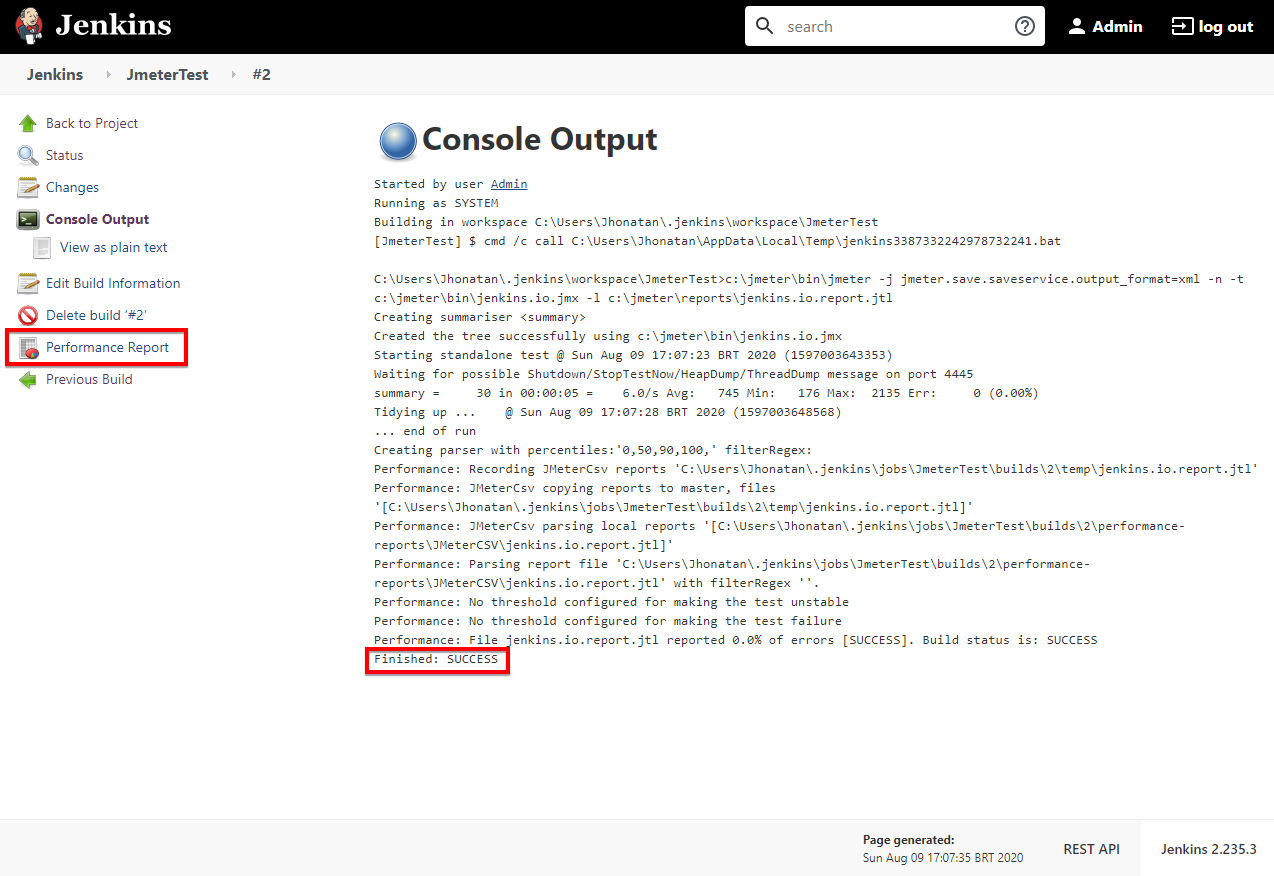
-
Console output view you can access the
Performance Reportand you will see the JMeter report data.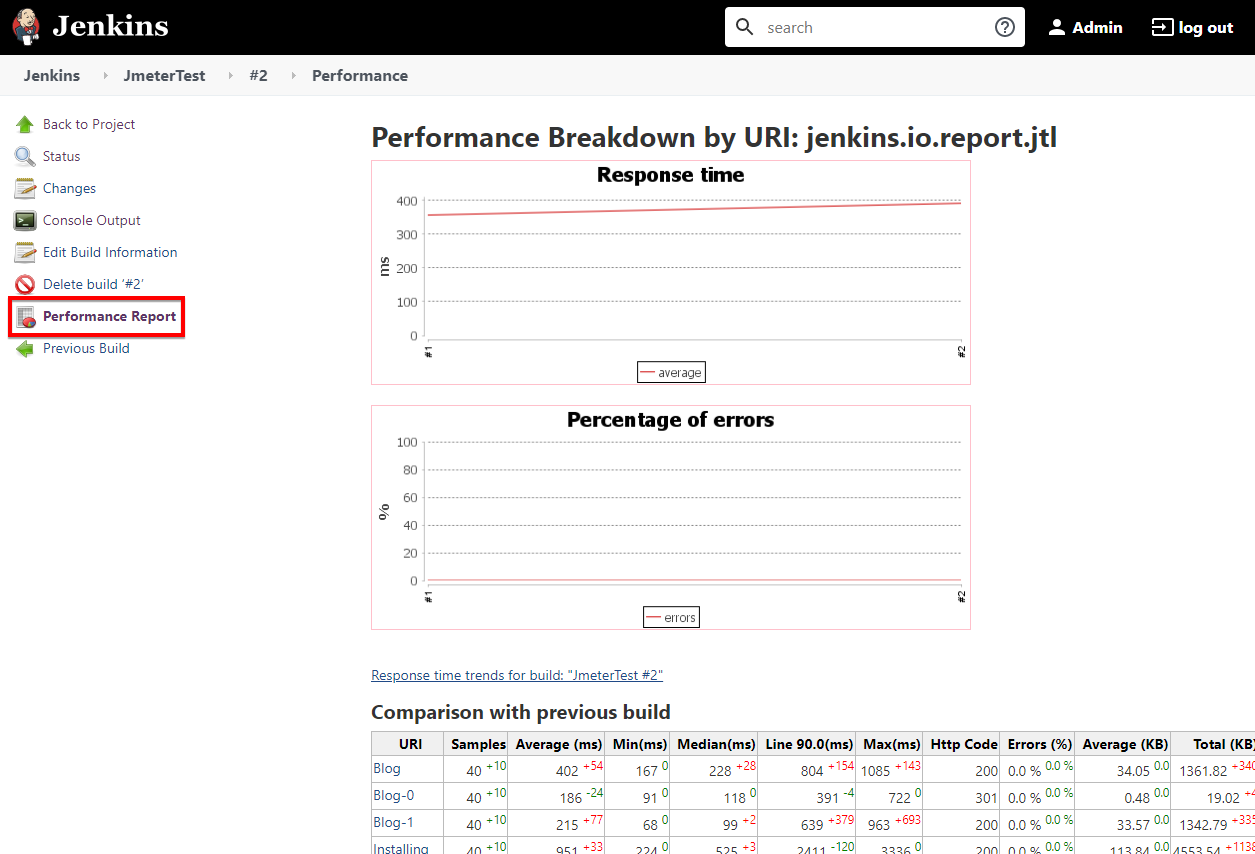
|
This page outlines how to use Apache JMeter with Jenkins. The instructions are intentionally simplified by running Apache JMeter on the Jenkins controller. Apache JMeter in a production Jenkins environment should be run on a Jenkins agent, not on the Jenkins controller. Learn more about Jenkins agents from the Using Jenkins agents page. |
Please submit your feedback about this page through this quick form.
Alternatively, if you don't wish to complete the quick form, you can simply indicate if you found this page helpful?
See existing feedback here.